For many of us in the textile screen printing industry, we continue to hear that computer-to-screen printers will change how we manage workflow and production performance for the better. We hear and read the testimonials from shops that have seen a dramatic change in their efficiency, then we see that the shop has at least 2 autos.
Well, of course, a CTS will help the bigger shop! But for most shops thinking about investing in a CTS Printer, they typically have a single auto, are maybe looking at getting a second in the near future but are still unsure if they will actually see improvements in production. In short: What’s my ROI? Great question. Below we will go over why you will see improvements in shop time and downtime on press.
Many of you reading this, who have been on the fence for a while, tend to have a good production crew. We often hear statements along these lines:
- My employees are far more efficient than others and have their processes dialed in. So, there may be no real improvement!
- My screen tech knows how light behaves with their films so they can finesse image resolution and maintain every dot and fine line
- If using a pre-registration template, they can achieve “perfect” registration every time (you always have to use the micros right, so of course it’s perfect)
- There is no way a glorified desktop printer can outperform me. Besides, you have to wait for the screen to print! My screen tech can grab the films already printed and line ‘em up perfectly!
- My press op is the fastest I have ever seen at lining up a 6-8 color job
Well, we no longer need to worry about losing image detail when using a CTS Printer. While it is true that at one point the printing of a large image was slow, as with all technology, it improves over time. Over the last several years, print speeds have greatly improved as have the resolution capabilities of the print heads (which directly relate to print speeds). This equates to an improvement in efficiency over traditional methods.
As for pre-registration, we will cover that in detail below.
Now for screen throughput – one can put a screen into the Spyder 3 CTS and within 15-45 seconds have that screen ready to expose. With a single screen tech we can:
- Take out the screen that was just printed
- Put that screen into an exposure system such as the V-Lux and start the exposure process
- Put a new screen in the CTS Printer
- Hit Print
- Pull the exposed screen from the V-Lux Exposure unit
- Washout the screen
- Set it up to dry
- Go back and repeat the process.
There is now potentially zero downtime in the screen room. In fact, the CTS Printer has probably been idle for half of this scenario.
Prepping Art and Creating Screens with Accurate Registration
Ok, so we have shown that investing in a CTS Printer will give you an improvement in screen throughput, and in previous blogs we have talked about image resolution quality improvements. Well, we have saved the best for last. The biggest production improvement – an improvement that will increase your bottom line – is how it pairs perfectly with all “on-press registration” methods.
What this means is your pre-press “image-to-screen” registration is complete the moment you put your screen into the CTS Printer. That’s it. Done. Well, I should clarify that you do need to ensure all 3 stop points are cleanly engaged.
Wait you say… it can’t be that simple. No really, it is. No more “oops, I placed that film wrong”. Or waiting for your guy on press to dial in registration on a 10 color sim process job. So, let’s back up a few steps to the artists chair and explain how we can make this so simple.
The art file your artist has created and sent through the RIP will always fall in the same place on your screen. No matter how many times you pull the screen out and put it back in. Every shop that has a CTS printer can do this.
But wait you say – how do we make sure the artist is setting things up correctly? Templates. The specifics of how to create one will be supplied by EXILE. For those who are unfamiliar with drawing programs, here is a quick overview.
Always do one of the following:
- Bring all finished art into a saved template and create your separations. This will be sent to the RIP in the Spyder 3 by hitting print and selecting the appropriate hot folder.
- Create your art in a new layer on top of a template layer – simply turn off the visibility of the template layer if needed. Follow the first step above for separations.
- If bringing in art from Photoshop, place the design on top of the template and move to where it’s needed. Always keep the photoshop file as a link, so any art changes can be updated.
Doing this will ensure that all art is in the correct place for each job. Be it a 1 color left chest or a 16 color full back at 20 inches tall. This will also allow the printer to not worry about anything other than locking in the screens with the appropriate tools for that press, loading the shirts and printing the job.
Quick Press Set-ups
Wait, locking in the screens? Tools? What’s needed?
All automatic press manufacturers have a Registration Platen, or in the case of MHM, registration pins. With MHM you simply push the screen into the print head and make sure the pins are seated properly (all heads must be zeroed out). With the other presses, you use their registration platen, pull the screen cleanly into the 3 point stop and clamp in. It is that simple. The 3 point stop on the registration platen will be the same as on the CTS Printer, as well as the registration pins for the MHM.
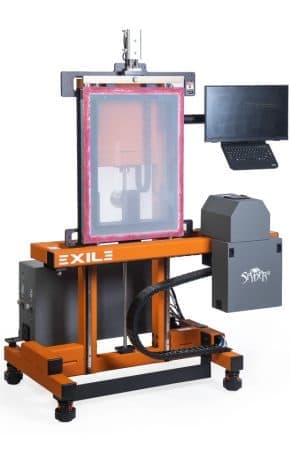
Given that your screens for this job all have equal mesh tension (this is another topic that has been written on extensively) your image will line up perfectly.
This is the main reason why you want a CTS Printer. From art separations, to screen imaging, to on press lock in, we have reduced the time needed to get the press back into production. Even when a separation is “not quite right” or an OOPS! was made. It’s simple:
- The artist can go back and make an adjustment to the separation
- Send the updated file to the CTS Printer
- The screen tech prints a new screen or screens
- The press operator puts on the registration platen, locks in the new screen and boom – perfect registration.
There are several online videos showing how fast a well-oiled shop can be with tearing down a finished design and setting up and starting production on a new design. I think we have all seen a particular shop demonstrate changing over to a 10+ color job within 10 minutes and be ready to start production. Not all shops will reach that level of efficiency. Most will be able to achieve that within 20 minutes at most. But how much faster is that than what you are currently running?
Have you timed your production crew yet? And not when they are aware the boss is watching, I mean, time them when they are behaving normally. I can guarantee you that they are not as fast. By investing in a CTS printer, you WILL save time on set up, which equates to less down time and more shirts printed per average work hour. This means you will have a more profitable business.
